To check the power supply on a PC running Windows 11, you can follow these steps: shut off the power supply, turn it back on, and check if the fan starts spinning. Additionally, you can check the power supply information on the sticker located on one of the sides of the power supply unit.
Another method is to measure the power consumption of your PC using a device like Kill-A-Watt. This will give you an idea of how much electricity your computer consumes and indirectly check the power supply’s efficiency. By following these steps, you’ll be able to determine the status and performance of the power supply on your Windows 11 PC.
Overview Of Pc Power Supply And Its Importance
The power supply is an essential component of a PC that provides electricity to all the other components, allowing them to function properly. It converts the AC power from the wall outlet into DC power that the computer can use. Without a functioning power supply, your PC won’t be able to turn on or perform any tasks.
Importance Of A Functioning Power Supply
A functioning power supply is crucial for the overall performance and longevity of your PC. Here are some reasons why:
- A stable power supply ensures that all components receive the necessary voltage and current to operate optimally.
- It protects your PC from power surges and spikes, preventing damage to sensitive internal components like the motherboard, CPU, and hard drives.
- A reliable power supply reduces the risk of unexpected shutdowns, data loss, and system crashes.
- It allows your PC to handle demanding tasks like gaming, video editing, or graphic design without overheating or experiencing performance issues.
Risks Of A Faulty Power Supply
If your power supply is faulty or underpowered, it can lead to various issues that can negatively impact your PC:
- Instability and frequent crashes, as the components may not receive the required power consistently.
- Data corruption and loss due to sudden power interruptions or voltage fluctuations.
- Component damage or failure, especially if the power supply delivers an inadequate or unstable power output.
- Reduced lifespan of the entire system, as a faulty power supply can cause excessive heat buildup and strain on other components.
Why It’s Essential To Check The Power Supply
Regularly checking your power supply is essential to ensure its proper functioning and prevent potential issues. Here’s why:
- Identify any signs of a failing power supply, such as unusual noises, burning smells, or random shutdowns.
- Determine if your power supply can handle the power demands of new hardware upgrades or additions.
- Prevent damage to other components by addressing power supply issues promptly.
- Maintain system stability and prevent unexpected performance issues.
By checking and monitoring your power supply, you can ensure that your PC remains in good working condition and avoid costly repairs or downtime in the future.

Credit: news.microsoft.com
Step 1: Shutting Off The Power Supply
To check the power supply on your PC running Windows 11, start by shutting off the power supply. Turn it back on and see if the fan spins. This will help determine if the power supply is working properly.
Importance Of Shutting Off The Power Supply
Before checking the power supply on your Windows 11 PC, it is crucial to shut off the power supply. This step is important for your safety and the well-being of your computer components. By shutting off the power supply, you prevent any potential electrical shocks or damage to your hardware.
How To Shut Off The Power Supply On A Windows 11 Pc
To shut off the power supply on your Windows 11 PC, follow these simple steps:
- Locate the power button on your computer case. It is usually located on the front or top panel of the case.
- Press and hold the power button for a few seconds until your computer powers down. You should hear your computer fans stop spinning, and the screen should turn off.
- You can also shut off the power supply by unplugging the power cord from the wall outlet or the back of your computer.
It is important to note that shutting off the power supply only turns off the electricity flowing to your computer. The power supply unit (PSU) still holds residual charge, so it’s recommended to wait for a few minutes before proceeding with any hardware checks or replacements.
Step 2: Checking The Power Supply Fan
One of the essential components of a computer’s power supply is the fan. The purpose of checking the power supply fan is to ensure that it is functioning properly. A malfunctioning fan can lead to overheating or even a complete power supply failure, which can result in damage to other components of your PC. In this step, we will guide you on how to check if the power supply fan is working, ensuring your PC remains cool and stable.
Purpose Of Checking The Power Supply Fan
The power supply fan plays a crucial role in maintaining the temperature of your PC. It helps to dissipate the heat generated by the power supply unit, preventing it from overheating. By checking the power supply fan, you can ensure it is spinning correctly, providing adequate cooling for your PC. This step is crucial to avoid potential damage to your hardware and ensure the longevity of your computer.
How To Check If The Power Supply Fan Is Working
Checking the power supply fan is a straightforward process that requires minimal tools. Here’s a step-by-step guide:
- Make sure your PC is powered off and unplugged from the power source to avoid any electrical hazards.
- Open the computer case by removing the screws or unlocking the side panel, depending on your PC’s design. Refer to your PC’s manual for specific instructions on how to access the power supply unit.
- Locate the power supply unit, which is usually positioned at the top or bottom of the case.
- Identify the power supply fan within the unit. It is typically visible from one side of the power supply.
- Inspect the fan visually to check for any obstructions, dust, or physical damage. Use a flashlight if needed to get a clear view.
- Once you have inspected the fan, carefully plug your PC back into the power source, making sure to follow safety protocols.
- Power on your PC and observe the power supply fan. It should start spinning as soon as the PC is turned on.
- If the fan does not spin or makes unusual noises, it may indicate a faulty fan that needs to be replaced. In such cases, it is recommended to consult a professional or contact the manufacturer for further assistance.
Remember, a functioning power supply fan is crucial for the overall health of your PC. Regularly checking and maintaining your power supply fan will help ensure proper cooling, prevent overheating, and extend the lifespan of your computer.
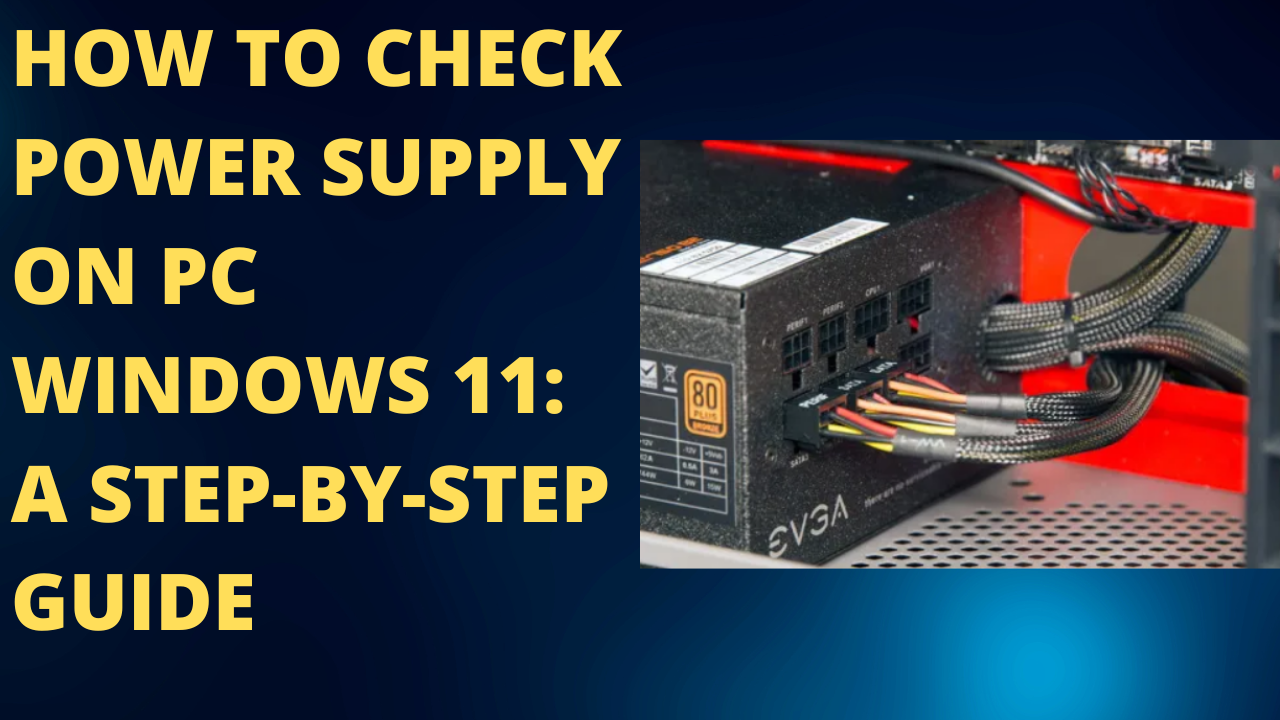
Step 3: Checking The Power Supply Information
To check the power supply on a PC running Windows 11, you can look for the power supply information on a sticker located on one of the sides of the power supply unit. This will provide you with the necessary details about your PC’s power supply.
When troubleshooting issues with your Windows 11 PC, it’s important to check the power supply information as it can provide valuable insights into the health and performance of your system. By understanding the power supply specifications, you can ensure that your PC is receiving adequate power and avoid potential hardware damage or performance issues.
Importance Of Checking The Power Supply Information
The power supply is a critical component of your PC, responsible for providing stable and sufficient power to the other hardware components. If the power supply is faulty or unable to deliver the necessary power, it can result in system instability, crashes, or even hardware failure.
By checking the power supply information, you can verify the wattage, amperage, efficiency, and other specifications of your power supply. This information can help you determine if your power supply is adequate for your system’s power requirements or if an upgrade is necessary.
Where To Find The Power Supply Information On A Windows 11 Pc
Locating the power supply information on your Windows 11 PC is a straightforward process. You can find the necessary information on a sticker attached to one of the sides of the power supply unit. Here’s a step-by-step guide:
- Turn off your PC and unplug it from the power source to ensure your safety.
- Open the case of your PC by removing the side panel.
- Locate the power supply unit, which is usually positioned at the top or bottom rear of the case.
- Inspect the sides of the power supply unit for a sticker that contains the power supply information.
- The sticker should display important details such as the wattage, voltage, amperage, and other relevant specifications.
Make sure to take note of the power supply information for future reference or when seeking assistance from technical support.
Checking the power supply information is a crucial step in troubleshooting hardware-related issues on your Windows 11 PC. By being aware of your power supply’s capabilities, you can ensure the efficient and reliable operation of your system. Now that you know how to find the power supply information, you can make informed decisions regarding upgrades or replacements if necessary.
Step 4: Measuring Pc Power Consumption
To check the power supply on a PC running Windows 11, you can measure the power consumption. Turn off the PSU, turn it back on and see if the fan turns. You can also use a device like Kill-A-Watt to measure the energy usage of your entire system, including peripherals.
Why It’s Important To Measure Pc Power Consumption
Measuring PC power consumption is an essential step in ensuring your computer operates efficiently and effectively. Knowing the power consumption of your PC allows you to understand how much electricity it consumes, helping you make informed decisions about energy usage and potentially reduce your carbon footprint. Additionally, measuring power consumption can help you identify any issues with your PC’s power supply, preventing potential damage and ensuring optimal performance. Overall, understanding and monitoring your PC’s power consumption is crucial for both energy efficiency and maintaining the longevity of your computer.
Various Methods To Measure Pc Power Consumption On Windows 11
When it comes to measuring power consumption on Windows 11, there are a few different methods you can use. Each method provides valuable insights into your PC’s energy usage, allowing you to evaluate and optimize its performance.
Method 1: Using A Power Consumption Monitoring Tool
One of the easiest ways to measure PC power consumption is by utilizing a power consumption monitoring tool. There are several software options available that provide real-time data on your computer’s energy usage. These tools typically display information such as current power consumption, voltage, and wattage, allowing you to track and analyze fluctuations in power usage. Some popular power consumption monitoring tools for Windows 11 include:
| Tool | Description |
|---|---|
| Example Tool 1 | An advanced power consumption monitoring tool with a user-friendly interface and customizable features. |
| Example Tool 2 | A lightweight power consumption monitoring tool that provides accurate readings and detailed reports. |
Method 2: Using A Power Meter
An alternative method to measure PC power consumption is by using a power meter. A power meter or watt meter is a device that plugs in between your PC and the power outlet, allowing you to measure the electricity consumed by your computer. Simply connect the power meter to the wall socket, then plug your PC into the meter. The power meter will display the power consumption in watts, giving you a clear indication of your PC’s energy usage.
Method 3: Calculating Estimated Power Consumption
If you don’t have access to a power consumption monitoring tool or a power meter, you can still estimate your PC’s power consumption by calculating it based on the components installed in your computer. Each hardware component, such as the CPU, GPU, and RAM, have specific power requirements, which can be found in their respective specifications. By adding up the power requirements of each component, you can get an approximate estimation of your PC’s total power consumption. However, it’s worth noting that this method provides a rough estimate and may not be as accurate as using specialized tools or meters.
In conclusion, measuring PC power consumption is crucial for energy efficiency and ensuring optimal performance. Whether you choose to use a power consumption monitoring tool, a power meter, or calculate the estimated power consumption, monitoring the power usage of your PC will help you make informed decisions about energy optimization and potentially prolong the lifespan of your computer.
Frequently Asked Questions Of How To Check Power Supply On Pc Windows 11
How Do I Check My Power Supply Settings Windows 11?
To check your power supply settings in Windows 11: 1. Go to the Start menu. 2. Type “Power & sleep settings” and click on it. 3. In the Power & sleep settings window, click on “Additional Power Settings” on the right side.
4. From there, you can adjust the power options and check your power supply settings.
How Do I Check My Pc Power Supply?
To check your PC power supply, follow these steps: 1. Shut off your PSU. 2. Turn on the PSU and see if the fan turns. You can also measure your PC’s power consumption by using a tool like Kill-A-Watt. Check the power supply information on the sticker attached to the unit for more details.
How Do I Check My Specs On Windows 11?
To check your specs on Windows 11, follow these steps: 1. Press the Windows key + R to open the Run dialog box. 2. Type “dxdiag” and press Enter. 3. The DirectX Diagnostic Tool window will open, displaying your system information, including your processor, memory, and graphics card.
How Do I Check My Pc Power Consumption?
To check your PC power consumption, turn off all devices, plug your PC into a Kill-A-Watt meter, then plug the meter into the wall. This will measure the energy usage of not just your PC, but also your monitor, speakers, and other peripherals.
Conclusion
To ensure smooth functioning and optimal performance of your PC running on Windows 11, it is vital to regularly check the power supply. By following simple steps like observing the PSU fan turning on and measuring power consumption, you can determine whether your power supply is functioning properly.
The power supply information can be found on a sticker attached to the unit. Remember, it’s always better to be proactive and address any potential power supply issues before they become major setbacks.


Leave a Reply