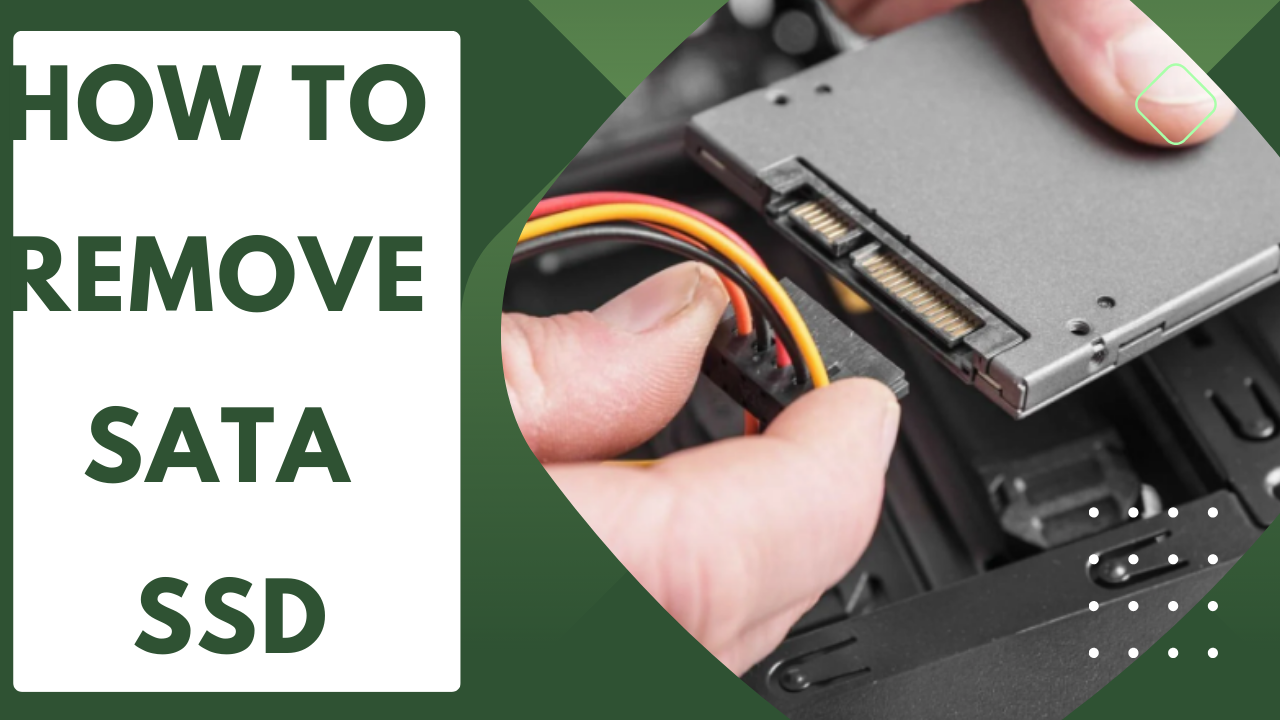
To remove a SATA SSD, carefully disconnect the SATA cable and power connectors from the hard drive. Make sure to handle the SSD gently to avoid any physical damage.
It is safe to remove and reinsert an SSD as it has no moving parts like a traditional hard drive. By following these steps, you can easily remove the SATA SSD from your computer without any data loss. Additionally, you can find more detailed instructions on websites such as iFixit, AOMEI Partition Assistant, or Microsoft Support.
Keep in mind that it is always important to properly disconnect hardware components to prevent any damage.
Step 1: Prepare For Removal
Before you begin removing your Sata SSD, it’s crucial to properly prepare for the process. This will ensure a smooth and damage-free removal. Follow these steps to ensure a safe removal:
Gather The Necessary Tools And Equipment
Before starting the removal process, it’s essential to gather the necessary tools and equipment. Here’s a list of items you will need:
- Screwdriver set
- Anti-static wrist strap
- Discharge mat or other static-safe surface
- Cleaning cloth
Ensure The Computer Is Powered Off And Unplugged
Before you begin removing the Sata SSD, it’s crucial to power off the computer and unplug the power cord. This will prevent any electrical accidents or damage during the removal process. Follow these steps:
- Shut down your computer by selecting the “Shut down” option from the Start menu.
- Once the computer has completely shut down, unplug the power cord from the electrical outlet.
Ground Yourself To Prevent Static Electricity Damage
Static electricity can be harmful to electronic components, including your Sata SSD. To prevent static electricity damage, it’s important to ground yourself before handling the SSD. Follow these steps:
- Wear an anti-static wrist strap by connecting it to a metal surface on your computer case.
- Place a discharge mat or another static-safe surface on your workspace.
- Make sure to touch the metal case of your computer to discharge any static electricity before touching the Sata SSD.
By following these steps, you can effectively prepare for the removal of your Sata SSD, ensuring a safe and hassle-free process. In the next steps of this guide, we’ll walk you through the actual removal process, so stay tuned!
Step 2: Locate The Ssd
To remove a SATA SSD from a computer, begin by locating it within the PC. Disconnect the SATA cable and carefully remove the drive from its place. Ensure to handle the SSD with care to avoid any physical damage.
Step 2: Locate the SSD Identify the physical location of the SATA SSD in your computer The next step in removing a SATA SSD from your computer is to identify its physical location. The SATA SSD is typically located inside your computer’s case, connected to the motherboard. To locate it, you will need to open up your computer case and visually inspect the internal components. Consult the user manual or online resources for specific instructions If you’re unsure about the exact location of the SATA SSD in your specific computer model, it’s best to consult the user manual or online resources for guidance. Manufacturers often provide detailed instructions on how to locate and remove specific components in their user manuals. You can also find helpful tutorials and guides online that provide step-by-step instructions for removing a SATA SSD from various computer models. To locate the SATA SSD in your computer, follow these steps: 1. Power off your computer: Before opening the computer case, make sure to shut down your computer and disconnect it from the power source to avoid any electrical accidents. 2. Open the computer case: Depending on your computer model, you may need to remove screws or release latches to open the case. Refer to the user manual or online resources for instructions specific to your computer model. 3. Locate the motherboard: Once the case is open, you will see the motherboard, which is the main circuit board that connects all the components of your computer. 4. Identify the SATA ports: Look for the SATA ports on the motherboard. These ports are usually rectangular and have a small plastic latch on one end. 5. Trace the SATA cables: Once you’ve located the SATA ports, trace the SATA cables connected to them. The SATA cables are flat and usually have an L-shaped connector on one end and a straight connector on the other end. 6. Locate the SATA SSD: Follow the SATA cables to find the SATA SSD. It is typically a small rectangular device with a circuit board and connectors on one side. Remember to handle the SATA SSD with care, avoiding static electricity and physical damage. If you need further assistance, consult the user manual or online resources for your specific computer model to ensure a safe and successful removal process. By following these steps and consulting the appropriate resources, you will be able to locate the SATA SSD in your computer and proceed to the next steps of removing it safely.Step 3: Disconnect Power And Data Cables
To disconnect power and data cables when removing a SATA SSD, start by locating the SATA cable and tracing it back to the motherboard. Carefully disconnect both the SATA cable and the power connector from the SSD to remove it.
Step 3: Disconnect Power and Data Cables Disconnecting the power and data cables from your SATA SSD is an important step in the process of removal. This ensures that the SSD is safely disconnected from the system and prevents any potential damage to the drive or the motherboard. Follow these simple steps to disconnect the power and data cables from your SSD. H3: Locate the SATA cable connected to the SSD 1. Start by locating the SATA cable that is connected to your SSD. This cable is responsible for transferring data between your SSD and the motherboard. 2. Trace the cable back to the SSD to ensure that you have located the correct one. Identifying the correct cable is crucial in the proper removal process. H3: Carefully unplug the SATA cable from the SSD 1. Once you have located the SATA cable, carefully unplug it from the SSD. 2. To do this, gently pull the connector straight off the SSD, ensuring that you do not apply excessive force or damage the connector or the SSD in the process. H3: Disconnect the power cable from the SSD 1. To disconnect the power cable from the SSD, locate the power connector that is attached to the SSD. This connector provides power to the drive. 2. Gently unplug the power connector from the SSD by pulling it straight off the drive. Be cautious not to pull on the cables or damage the connector. By carefully following these steps, you can safely disconnect the power and data cables from your SATA SSD. This allows for the secure removal of the drive from your system. Remember to handle the SSD delicately, avoiding any excessive force or rough handling, as SSDs are sensitive electronic devices. Once you have successfully disconnected the power and data cables, you can move on to the next step in the removal process. Summary Disconnecting the power and data cables from your SATA SSD is an essential step in safely removing the drive from your system. By locating the SATA cable, carefully unplugging it from the SSD, and disconnecting the power cable, you ensure that the drive is no longer connected to the system. This process helps prevent any potential damage and prepares the SSD for removal.Step 4: Remove The Ssd From The Mounting Bracket
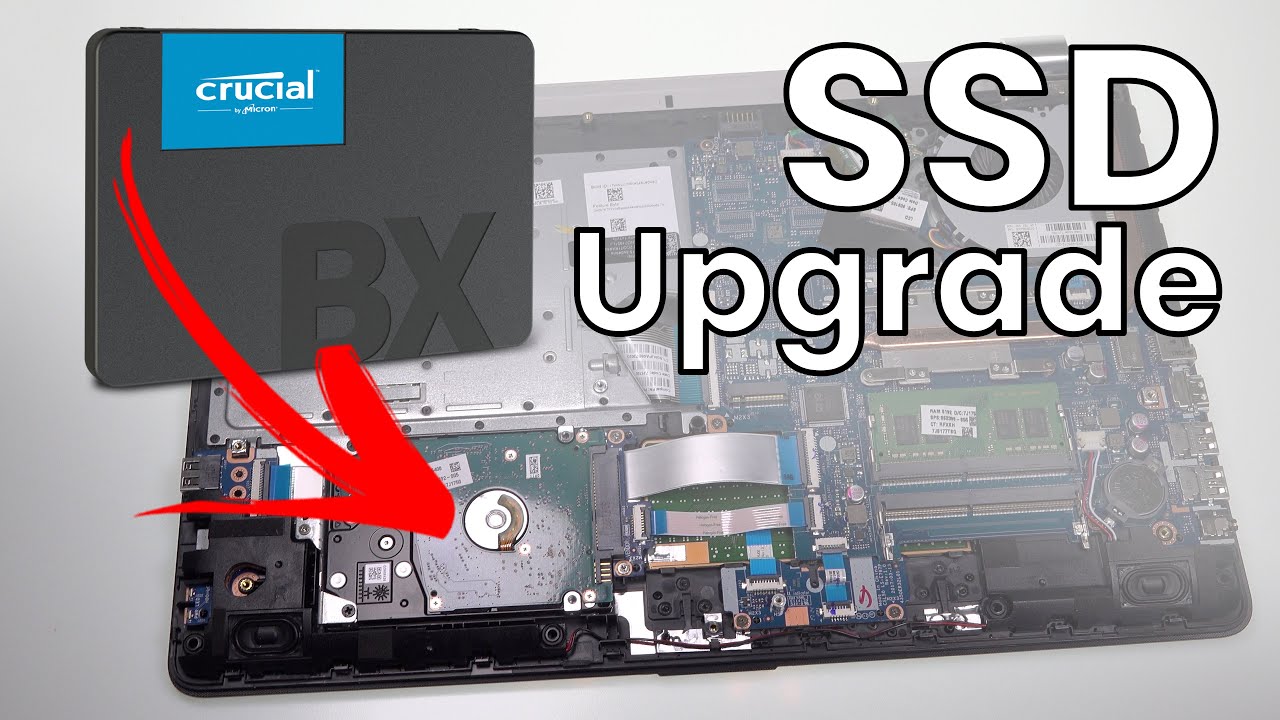
If the SSD is secured in a mounting bracket, you’ll need to remove any screws or brackets holding it in place. Follow these simple steps:
If The Ssd Is Secured In A Mounting Bracket, Remove Any Screws Or Brackets Holding It In Place
1. Locate the screws or brackets that secure the SSD to the mounting bracket. They are usually located on the sides or bottom of the bracket. Use a small screwdriver or a Phillips head screwdriver to remove them.
2. Once the screws or brackets are removed, the SSD should be free from the mounting bracket. Take a moment to ensure that there are no other components or cables attached to the SSD.
Gently Slide Or Lift The Ssd Out Of The Mounting Bracket
1. With the screws or brackets removed, gently slide or lift the SSD out of the mounting bracket. Be sure to support the SSD with your hand to prevent it from falling or getting damaged.
2. Check for any resistance or obstructions before completely removing the SSD from the bracket. If you encounter any difficulty, gently wiggle the SSD back and forth to loosen it from the bracket.
3. Once the SSD is free from the mounting bracket, carefully set it aside on a static-free surface. Avoid touching any of the connectors or components on the SSD to prevent potential damage.
Removing the SSD from the mounting bracket is a necessary step to access and replace the SSD in your PC. With proper handling and following these simple steps, you can safely remove the SSD and proceed with the next steps in your upgrade or replacement process.
Step 5: Safely Store Or Dispose Of The Ssd
To safely remove a SATA SSD from your PC, begin by disconnecting the SATA cable and power connectors attached to the drive. Ensure that you unmount the drive first to prevent data loss. Follow the guidelines provided by your PC manufacturer or refer to online tutorials for specific instructions on removing the SSD from your particular laptop or desktop model.
If You Plan On Reusing The Ssd, Store It In An Anti-static Bag
If you are planning on reusing the SSD, it’s important to store it properly to protect it from potential damage. The first step is to find an anti-static bag, which is designed to prevent electrostatic discharge that can harm sensitive electronic components. These bags are commonly used to store computer hardware, including SSDs.
To store the SSD in the anti-static bag:
- Ensure that the SSD is clean and free from any dirt or dust particles.
- Place the SSD inside the anti-static bag.
- Seal the bag to create a protective barrier against static electricity.
Storing the SSD in an anti-static bag reduces the risk of damage due to electrostatic discharge, which can occur when handling electronic components. By safely storing the SSD, you increase the chances of its longevity and maintain its performance for future use.
If You Are Disposing Of The Ssd, Follow Proper Electronic Waste Disposal Guidelines
If you have decided to dispose of the SSD instead of reusing it, it is crucial to follow proper electronic waste disposal guidelines. Electronic waste, or e-waste, can contain harmful substances that pose a threat to the environment if not disposed of correctly.
- Research local e-waste recycling facilities or programs that accept SSDs. These facilities are specifically designed to handle electronic waste and ensure proper recycling.
- Contact the facility to inquire about their disposal procedures and any specific requirements they may have for SSD disposal.
- Follow their instructions on packaging and transporting the SSD to the facility.
- Deliver the SSD to the designated recycling facility, following their guidelines to ensure it reaches the proper destination.
By adhering to proper electronic waste disposal guidelines, you contribute to the preservation of the environment and the responsible management of hazardous materials contained within the SSD. This ensures that the SSD is disposed of in a way that minimizes its impact on the ecosystem.
Credit: m.youtube.com
Frequently Asked Questions For How To Remove Sata Ssd
How Do I Unplug My Sata Ssd?
To unplug your SATA SSD, follow these steps: 1. Disconnect the SSD SATA cable from the motherboard. 2. Carefully remove any power connectors attached to the SSD. 3. Ensure you have safely unmounted the SSD to prevent data loss. 4. Once disconnected, you can safely remove the SSD from your computer.
Remember to handle the SSD with care as it contains sensitive data.
How Do I Safely Remove An Ssd From My Computer?
To safely remove an SSD from your computer: 1. Look for the Safely Remove Hardware icon on the taskbar. 2. Press and hold (or right-click) the icon and select the hardware you want to remove. 3. Disconnect the cables attaching the SSD to the motherboard.
4. Carefully remove the SSD from its slot. 5. Store the SSD safely to prevent any physical damage. Note: SSDs have no moving parts, reducing the risk of damage while handling.
How Do I Remove Sata From My Computer?
To remove a SATA from your computer, follow these steps: 1. Disconnect the cables attaching the hard drive to the motherboard. 2. Carefully disconnect both the SATA and power connectors from the hard drive. 3. Ensure the computer is powered off before removing any hardware.
4. Handle the SSD carefully as it has no moving parts and is less prone to physical damage. 5. If unsure, consult manufacturer guidelines or seek professional assistance.
Is It Safe To Unplug Sata Ssd?
Yes, it is safe to unplug a SATA SSD. SSDs have no moving parts, reducing the risk of physical damage. Remember to unmount the drive first to prevent data loss.
Conclusion
Removing a SATA SSD from your computer can be done safely and efficiently. Start by disconnecting the SATA cable and power connectors from the SSD. Take caution to handle the SSD properly, as it is a delicate device. Remember that an SSD has no moving parts, reducing the risk of physical damage during removal.
Safely remove the hardware using the taskbar or taskbar settings in Windows. By following these steps, you can safely remove your SATA SSD without any data loss or damage to your computer.


Leave a Reply