To enable XMP on Insydeh20 BIOS, check if your motherboard supports XMP. If it does not have the option to enable XMP in the BIOS settings, you may need to upgrade your motherboard to enable XMP.
Understanding Xmp And Its Benefits
If you are looking to enhance your system’s performance, enabling XMP can be a game-changer. In this blog post, we will explore what XMP is and why it is important. We will also discuss the benefits of enabling XMP for your system’s overall performance.
What Is Xmp And Why Is It Important?
XMP (eXtreme Memory Profile) is an Intel-developed technology that allows you to overclock your RAM modules beyond their default specifications. Most modern motherboards and BIOS systems, including Insydeh20, support XMP. Enabling XMP provides you with the ability to unlock the full potential of your RAM, allowing it to run at higher frequencies and timings.
By activating XMP, you are essentially telling your system to utilize the optimized performance settings stored in your RAM’s SPD (Serial Presence Detect) module. These settings were created and tested by the RAM manufacturer to ensure stability and performance.
The Benefits Of Enabling Xmp For Your System Performance.
Enabling XMP offers several benefits for your system’s performance:
- Improved Memory Speed: XMP allows your RAM modules to operate at higher speeds, resulting in improved data transfer rates and faster overall system performance.
- Enhanced System Responsiveness: With XMP enabled, your system can process data more efficiently, leading to quicker response times for applications and smoother multitasking.
- Better Gaming Performance: XMP enables your RAM to deliver the necessary bandwidth for demanding games, reducing lag and providing a more immersive gaming experience.
- Stability and Compatibility: XMP profiles are specifically designed and tested by RAM manufacturers to ensure stable performance with compatible systems. Enabling XMP ensures that your RAM is running at its optimal settings, reducing the chances of crashes or compatibility issues.
Overall, enabling XMP can significantly enhance your system’s performance, providing you with a smoother and more responsive computing experience.
In conclusion, understanding XMP and its benefits is crucial if you seek to optimize your system’s performance. By enabling XMP, you can unleash the full potential of your RAM, resulting in improved speed, responsiveness, and stability.

Credit: winraid.level1techs.com
Exploring The Insydeh20 Bios Interface
To enable XMP on Insydeh20 BIOS interface, first ensure that your motherboard supports XMP and that the option is not grayed out. If the option is not available or grayed out, it may indicate that your motherboard does not support XMP, and you may need to upgrade your motherboard to enable XMP.
Brief Overview Of The Insydeh20 Bios Interface
The Insydeh20 BIOS interface is a system firmware that acts as an intermediary between the hardware and the operating system of your computer. In other words, it is the software that enables you to configure and control various settings of your computer’s hardware components.
The Insydeh20 BIOS interface provides an easy-to-navigate user interface that allows you to adjust settings such as boot order, system time, CPU settings, and more. It offers advanced options that can help optimize your computer’s performance and customize hardware configurations according to your specific needs.
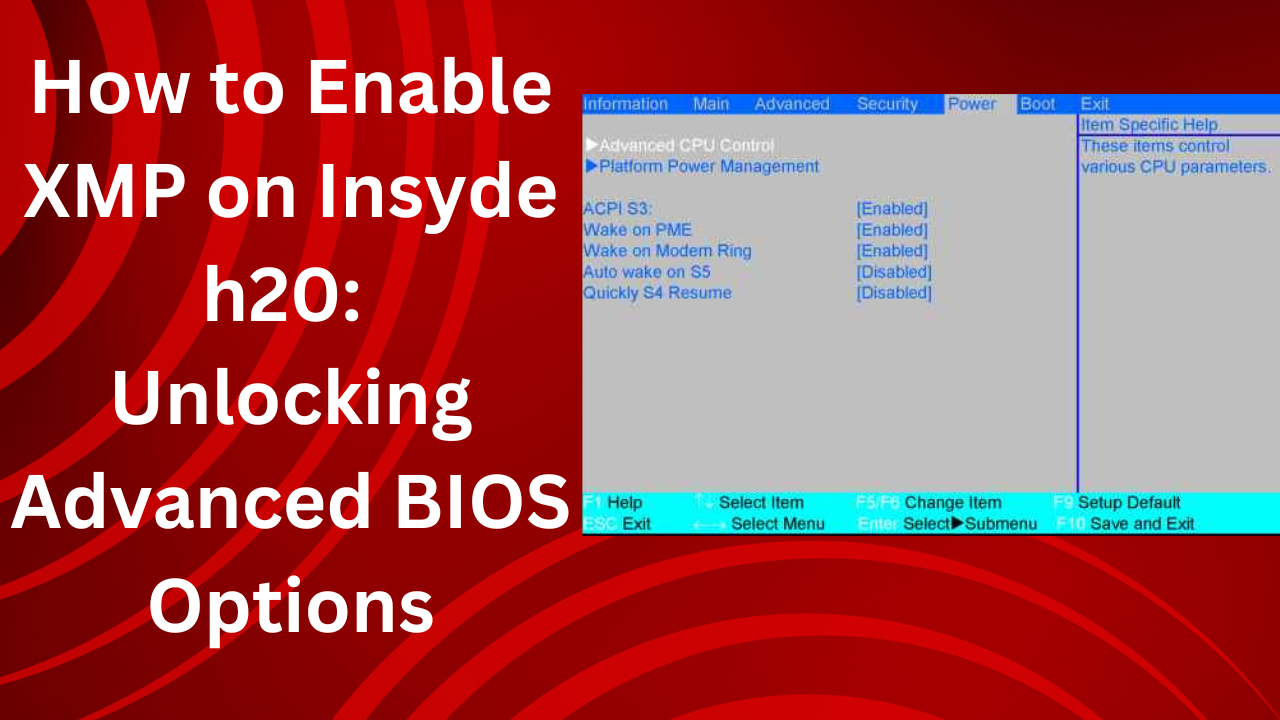
Navigating The Bios Settings Menu
To enable XMP on Insydeh20 BIOS, you need to navigate through the BIOS settings menu. Here is a step-by-step guide on how to do it:
- Restart your computer and press the designated key (often Del, F2, or F10) to enter the BIOS setup.
- Once you are inside the BIOS setup, you will see a menu with different categories, such as Main, Advanced, Security, Boot, and more. Use the arrow keys on your keyboard to navigate through the menu.
- Locate the category that contains the memory settings. This is often labeled as “Advanced” or “RAM Settings.” Highlight this category and press Enter.
- Within the memory settings category, you should find an option related to XMP. This option may be called “Memory Profile,” “DRAM Configuration,” or something similar. Select this option.
- In the XMP settings, there should be a list of profiles available for your memory. Select the desired XMP profile that matches your RAM’s specifications and supports overclocking.
- Save the changes you made by selecting the “Save & Exit” or similar option. This will restart your computer and apply the XMP settings.
Once you have successfully enabled XMP on your Insydeh20 BIOS, your computer’s RAM will run at its maximum supported frequency, providing better performance for tasks that require high memory bandwidth, such as gaming or multimedia editing.
Keep in mind that not all computers or motherboards support XMP, and there might be limitations imposed by the manufacturer. If you don’t see the XMP option in your BIOS settings, it could indicate that your motherboard does not have XMP support.
It’s important to note that enabling XMP and overclocking your RAM can increase system heat and power consumption. Make sure your computer is adequately cooled and that your power supply can handle the increased load before enabling XMP.
By exploring the Insydeh20 BIOS interface and navigating the settings menu, you can access advanced options like XMP to optimize your computer’s performance based on your specific needs.
Identifying The Advanced Options Menu
If you’re trying to enable XMP on an Insydeh20 BIOS, accessing the advanced options menu is necessary. However, some motherboards may not have the option to enable XMP or grey it out. In this case, upgrading your motherboard may be required.
Locating The Advanced Options Menu In The Insydeh20 Bios
To enable XMP on Insydeh20 BIOS, you first need to locate the advanced options menu. Follow the steps below to find this menu:
- Turn on your computer and access the Insydeh20 BIOS by pressing the designated key during startup. This key can be different depending on your computer’s manufacturer, so you may need to consult the user manual or search online for the specific key.
- Once you enter the BIOS, navigate to the main menu where you will see a list of options.
- In the main menu, look for an option called “Advanced” or “Advanced Options.” This option may be located in a different tab or page depending on your BIOS version.
- Select the “Advanced” option using the arrow keys on your keyboard and press Enter to access the advanced options menu.
By following these steps, you should be able to locate the advanced options menu in the Insydeh20 BIOS. Remember to save any changes you make before exiting the BIOS to ensure that the settings are applied.
Understanding Why Some Bios Versions May Not Have This Menu
It’s important to note that not all BIOS versions have the advanced options menu or the option to enable XMP. The availability of this menu depends on the motherboard manufacturer and the specific firmware version installed on your computer. Here are a few reasons why some BIOS versions may not have the advanced options menu:
- Incompatibility: Some older motherboards may not support XMP or have limited overclocking options in the BIOS.
- OEM Restrictions: Original Equipment Manufacturers (OEMs) sometimes customize the BIOS and remove certain options to prevent users from making unauthorized changes that could potentially damage the system.
- Hardware Limitations: In some cases, the hardware itself may not support XMP or advanced overclocking options.
If your BIOS version does not have the advanced options menu or the option to enable XMP, unfortunately, there is nothing you can do to enable it. Upgrading your motherboard to a more recent model that supports XMP would be the only solution in this case.
Enabling Xmp In Insydeh20 Bios
Enabling XMP (eXtreme Memory Profile) in your Insydeh20 BIOS can greatly enhance the performance of your system’s RAM. This feature allows you to optimize your memory settings, ensuring that it operates at its maximum speed and stability. However, accessing the advanced options menu in the BIOS and enabling XMP can sometimes be a bit tricky. In this guide, we’ll walk you through the step-by-step process of enabling XMP in Insydeh20 BIOS.
Step-by-step Guide To Enabling Xmp In The Advanced Options Menu
Enabling XMP in Insydeh20 BIOS requires some navigation through the advanced options menu. Follow these steps to enable XMP:
- Start by booting up your computer and entering the BIOS setup.
- Once you’re in the BIOS setup, locate and navigate to the “Advanced” or “Advanced Settings” menu.
- Within the advanced settings menu, look for an option related to memory or RAM settings. The exact wording may vary depending on your specific BIOS version.
- Once you’ve located the memory or RAM settings option, enter it to access the memory configuration settings.
- Within the memory configuration settings, you should see an option labeled “XMP” or “Memory Profile”. Select this option.
- Depending on your BIOS version, you may have multiple XMP profiles to choose from. Select the profile that best suits your needs or preferences.
- Save the changes and exit the BIOS setup.
- Upon restarting your computer, the XMP settings will be applied, optimizing your RAM performance.
Troubleshooting Common Issues When Enabling Xmp
While enabling XMP in Insydeh20 BIOS should be a straightforward process, here are some common issues you may encounter:
- If you can’t find the XMP option in the advanced settings menu, double-check that your motherboard supports XMP. Some motherboards may not have this feature.
- If the XMP option is present but grayed out, it means that your RAM modules may not be compatible with XMP. Try updating your BIOS to the latest version and ensure that your RAM modules are XMP capable.
- If you experience stability issues or system crashes after enabling XMP, it’s possible that your system is overclocking too aggressively. Take note of the XMP profile you selected and try a lower profile to find a stable configuration.
- If you still encounter issues or have questions, consult your motherboard’s manual or reach out to the manufacturer’s support for further assistance.
In conclusion, enabling XMP in Insydeh20 BIOS can provide a significant performance boost to your system’s RAM. By following the step-by-step guide and troubleshooting common issues, you can optimize your memory settings and unleash the full potential of your RAM.
Optimizing System Performance With Xmp
Learn how to optimize system performance with XMP on Insydeh20 by enabling it in the BIOS settings. Increase the speed and efficiency of your laptop with this simple step.
Maximizing Ram Performance Through Xmp Settings
One of the key ways to optimize your system’s performance is through maximizing RAM performance using XMP settings. XMP, or Extreme Memory Profile, is a feature that allows you to overclock your RAM and achieve higher memory speeds than the default settings. By enabling XMP, you can unlock the full potential of your RAM and experience faster data transfers and improved overall system performance.
Enabling XMP is a straightforward process. Here’s how you can do it:
- Start by entering your computer’s BIOS. You can usually access the BIOS by pressing a specific key during the boot process (common keys include F2, Del, or Esc).
- Navigate to the “Advanced” or “Overclocking” section in the BIOS menu.
- Look for the option to enable XMP. The exact location of this option may vary depending on your motherboard manufacturer and BIOS version. It could be under a section titled “Memory Settings,” “DRAM Configuration,” or similar.
- Select the XMP profile that matches your RAM specifications. This profile will automatically adjust the memory frequency, timings, and voltage to optimize performance.
- Save your changes and exit the BIOS. Your system will reboot with the new XMP settings applied.
It’s important to note that not all motherboards support XMP, so it’s essential to check your motherboard’s specifications before attempting to enable XMP. If your motherboard doesn’t have XMP support, you won’t find the option in the BIOS settings.
Understanding The Impact Of Xmp On Overall System Performance
Enabling XMP can have a significant impact on the overall performance of your system, especially when it comes to memory-intensive tasks such as gaming, video editing, or multitasking. Here are some benefits that XMP can bring:
- Improved data transfer rates: By overclocking your RAM, XMP allows for faster data transfers between the memory and other components, resulting in reduced loading times and improved responsiveness.
- Enhanced multitasking capabilities: XMP optimizes memory timings and frequencies, enabling your system to handle multiple tasks simultaneously without experiencing lags or slowdowns.
- Smooth gaming performance: XMP can significantly improve gaming performance by ensuring a stable and consistent flow of data to the CPU and GPU, reducing stuttering and improving frame rates.
- Faster application launching: With XMP, your system can load applications and files more quickly, providing a seamless user experience.
By enabling XMP, you can unleash the full potential of your RAM and enjoy a faster and more efficient computing experience. Just make sure to check your motherboard’s compatibility with XMP before attempting to enable it.
Important Considerations And Limitations
Enabling XMP on InsydeH20 BIOS can significantly improve the performance of your system’s RAM. However, before diving into the process, it is crucial to understand the important considerations and limitations associated with this feature. By considering these factors, you can ensure a seamless and successful experience with your XMP settings.
Factors To Consider Before Enabling Xmp
Before enabling XMP on InsydeH20 BIOS, there are a few factors to keep in mind:
- RAM Compatibility: Ensure that your RAM modules are compatible with XMP. XMP is designed for high-performance RAM modules, so it’s essential to check whether your RAM supports this feature before attempting to enable it.
- System Stability: Enabling XMP can result in the system becoming less stable due to increased clock speeds. It is recommended to have a stable power supply and cooling system to prevent any potential issues.
- Operating System Support: Verify that your operating system supports XMP. While most modern operating systems can handle XMP settings, it’s always a good idea to double-check for compatibility.
Limitations And Compatibility Issues With Certain Hardware Configurations
Although XMP can enhance system performance, it’s important to note that there can be limitations and compatibility issues with certain hardware configurations. These limitations may include:
- Motherboard Compatibility: Some motherboards do not support XMP or may have limited XMP functionality. It’s recommended to check your motherboard specifications or consult the manufacturer’s documentation to confirm XMP compatibility.
- RAM Module Configuration: XMP may not work correctly if the RAM modules are not correctly installed or if they are not compatible with your motherboard. Ensure that the RAM modules are installed in the recommended slots and that they meet the required specifications.
- Overclocking Risks: Enabling XMP involves overclocking your RAM modules. Overclocking can potentially damage the RAM modules or other components if not done correctly. It’s essential to follow proper overclocking procedures and monitor system temperatures to prevent any hardware issues.
Understanding these limitations and considering the hardware compatibility will help you make an informed decision when enabling XMP on InsydeH20 BIOS. By taking the necessary precautions and ensuring compatibility, you can optimize your system’s RAM performance effectively.
Frequently Asked Questions For How To Enable Xmp On Insydeh20
How To Unlock Advanced Settings In Insydeh20 Bios?
To unlock advanced settings in insydeh20 BIOS, follow these steps: 1. Restart your computer and enter the BIOS setup by pressing the designated key. 2. Locate the “Security” or “Advanced” tab. 3. Look for an option called “BIOS Lock” or “Advanced Menu” and set it to “Enabled.
” 4. Save and exit the BIOS setup. 5. Upon restarting, you should have access to the advanced settings in the insydeh20 BIOS.
How Do I Activate Xmp?
XMP may not be available in the BIOS due to limitations on certain motherboards. If the option is not present or greyed out, it means your motherboard does not support XMP. In such cases, upgrading your motherboard is necessary to enable XMP.
How To Find Xmp In Uefi Bios?
To find XMP in UEFI BIOS, follow these steps: 1. Restart your computer and enter the BIOS settings by pressing [key] during startup. 2. Look for the “Memory” or “Overclocking” section. 3. Within this section, locate the “XMP Profile” or “Memory Profile” option.
4. Enable XMP by selecting the appropriate profile or setting the memory speed to its rated frequency. 5. Save the changes and exit the BIOS. XMP should now be enabled for your system.
Why Is There No Xmp Profile In Bios?
Some motherboards do not support XMP profiles in the BIOS, so you cannot enable it. Upgrading your motherboard is the only solution in such cases.
Conclusion
To enable XMP on Insydeh20 BIOS, it is important to note that not all motherboards support this feature. Some may not have the option to turn it on or may grey it out. If you find yourself in this situation, unfortunately, there is no workaround.
Upgrading your motherboard would be the only solution to enable XMP. Ensure you check your motherboard specifications before attempting to enable XMP to avoid any disappointments.


Leave a Reply