
To check what power supply you have on your PC, turn off your computer, unplug everything, remove one of the side panels of the case, and locate the power supply unit (PSU). The model and wattage information should be visible on the side of the PSU.
Another option is to search for the PC’s model number online, find the manufacturer’s product page, and look for the PSU type listed in the product specifications. Knowing your PC’s power supply can help you in upgrading other components, such as the graphics card.
Understanding The Importance Of Checking Your Power Supply
When it comes to building or upgrading your PC, understanding the importance of checking your power supply is crucial. The power supply unit (PSU) is responsible for providing the necessary power to all the components of your computer. Without a compatible power supply, your PC may not perform at its optimal level and can even experience stability issues. In this article, we will delve into the significance of having a compatible power supply and the impact of an inadequate power supply on the performance and stability of your PC.
Importance Of Having A Compatible Power Supply With Your Pc Components
Having a compatible power supply with your PC components is essential for several reasons. Let’s take a look at a few reasons why it’s important:
- Efficient power delivery: Each component of your PC requires a specific amount of power to function properly. When you have a compatible power supply, it can deliver the right amount of power to each component, ensuring optimal performance.
- Preventing damage: Using an incompatible power supply can put your PC components at risk. It may provide insufficient power or deliver too much power, potentially causing damage to sensitive components like the motherboard, GPU, or CPU.
- Future upgrades: Upgrading your PC in the future becomes easier when you have a compatible power supply. It eliminates the need to purchase a new power supply when upgrading components like the graphics card or processor.
Impact Of An Inadequate Power Supply On The Performance And Stability Of Your Pc
An inadequate power supply can have a significant impact on the performance and stability of your PC. Let’s explore a few of the potential consequences:
- System instability: Insufficient power supply can lead to instability issues, resulting in frequent crashes, freezes, or unexpected shutdowns. These issues can be frustrating and disrupt your productivity or gaming experience.
- Performance degradation: When your PC doesn’t receive enough power, it may not be able to perform at its optimal level. You may notice a decrease in overall performance, slower load times, and laggy graphics in games or resource-intensive applications.
- Component failure: Using an inadequate power supply can put stress on your PC components, potentially leading to premature failure. It can cause components to overheat or operate outside their recommended voltage ranges, increasing the risk of damage and reducing their lifespan.
In conclusion, checking your power supply’s compatibility with your PC components is crucial for ensuring optimal performance and stability. It not only protects your components from potential damage but also allows for smooth future upgrades. By investing in a high-quality and compatible power supply, you can enjoy a reliable and efficient PC that meets your computing needs.
Checking Power Supply Without Using Software
Checking the power supply of your PC is an important step in understanding the capabilities of your system. While there are software tools available that can provide this information, you may want to know how to check it without using any software. In this guide, we will walk you through the process of checking the power supply without relying on software tools.
To access the power supply unit (PSU), you will need to remove the side panel of your PC case. This is usually located on the left side of the case when facing the front of the PC. Follow these steps to remove the side panel:
- Turn off your PC and unplug it from the power source.
- Place the PC on a stable surface.
- Locate the screws or fasteners securing the side panel in place.
- Use a screwdriver or other suitable tool to remove the screws or fasteners.
- Gently slide or lift the side panel to remove it from the case.
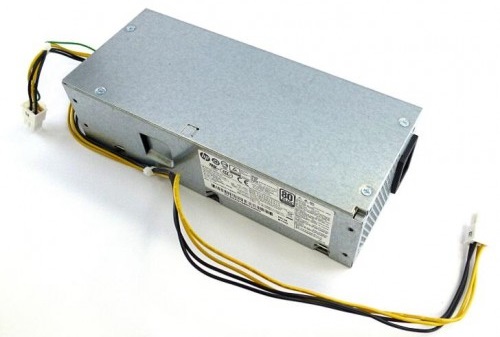
Once the side panel is removed, you can locate the power supply unit (PSU) inside your PC. The PSU is typically a rectangular metal box with a fan and cables coming out of it. It is usually located at the top or bottom of the case, towards the back. Look for a component that matches this description.
To identify the specifications and wattage of the PSU, you will need to look for a label or sticker on the unit itself. This label should provide important information about the PSU, including its wattage rating and other specifications.
Here is an example of the information you might find on the label:
| Specification | Value |
|---|---|
| Wattage | 500W |
| Efficiency Rating | 80 Plus Bronze |
| Model Number | ABC123 |
Make note of the wattage rating, as this will indicate the maximum power output of the PSU. This information is crucial if you are planning to upgrade other components of your PC, such as the graphics card, which may require a certain power supply wattage.
By following these steps, you can easily check the power supply of your PC without using any software tools. Knowing the wattage and specifications of your PSU is essential for making informed decisions when it comes to upgrading your computer.
Checking Power Supply Using A Multimeter
When it comes to checking the power supply on your PC, using a multimeter can be an invaluable tool. A multimeter allows you to measure the voltage outputs of your power supply, giving you insight into its specifications. In this article, we will guide you through the process of checking your power supply using a multimeter, from choosing a suitable multimeter to interpreting the results. Let’s get started!
Choosing A Multimeter Suitable For Measuring Psu Voltage
Before you begin measuring your power supply voltage outputs, it’s essential to choose a suitable multimeter for the job. Here are a few things to consider:
- Make sure the multimeter has a voltage measuring range that covers the output voltage of your power supply. Most PC power supplies have output voltages of +3.3V, +5V, and +12V, so ensure your multimeter can measure at least up to these values.
- Look for a multimeter with a high level of accuracy. This will provide more precise measurements and allow you to identify any potential issues with your power supply.
- Consider the features you may need, such as the ability to measure current or resistance. While these may not be necessary for measuring power supply voltage, having these additional capabilities can make your multimeter more versatile.
Using A Multimeter To Measure Psu Voltage Outputs
Once you have chosen a suitable multimeter, you can begin measuring the voltage outputs of your power supply. Here’s how:
- Make sure your PC is powered off and unplugged from the electrical outlet to prevent any accidents.
- Locate the 24-pin connector that connects your power supply to the motherboard. This connector carries the necessary power to all the components in your PC.
- Using the multimeter’s probes, touch the black probe to any ground pin on the 24-pin connector. Ground pins are usually labeled with the color black.
- Next, touch the red probe to the pins corresponding to the voltage outputs you want to measure. These pins are typically labeled with the voltage value (+3.3V, +5V, +12V).
- Once the probes are in place, turn on the power supply. The multimeter will display the voltage measurements for the selected pins.
Interpreting The Results To Determine The Power Supply Specifications
After measuring the voltage outputs of your power supply, you can interpret the results to determine its specifications. Here’s what you need to know:
| Voltage Output | Typical Range |
|---|---|
| +3.3V | 3.135V – 3.465V |
| +5V | 4.75V – 5.25V |
| +12V | 11.4V – 12.6V |
If the measured voltage falls within these ranges, it indicates that your power supply is functioning properly. However, if the voltage deviates significantly from these values, it may indicate a problem with your power supply.
Keep in mind that these are general ranges, and the specific tolerances may vary depending on your power supply model. Refer to the manufacturer’s specifications for the exact tolerances of your power supply.
By using a multimeter to measure your power supply voltage outputs and interpreting the results correctly, you can ensure that your power supply is providing the necessary voltage to your PC components. This knowledge can help you troubleshoot any power-related issues and make informed decisions when upgrading your computer hardware.
Checking Power Supply Wattage Using A Psu Tester
When it comes to troubleshooting or upgrading your PC, understanding the power supply wattage is essential. A PSU (Power Supply Unit) tester is a handy tool that allows you to determine the wattage of your power supply without the need for specialized software or complicated procedures. In this guide, we will explain how to check what power supply you have on your PC using a PSU tester.
Understanding The Purpose And Functionality Of A Psu Tester
A PSU tester is a small device designed specifically for checking the functionality and wattage of a power supply unit. It helps you ensure that your power supply is delivering enough power to meet your system’s requirements. The tester works by connecting to the power supply and providing a readout of the voltage levels and wattage.
Connecting The Psu Tester To The Power Supply
Connecting a PSU tester to your power supply is a straightforward process. Follow the steps below:
- Turn off your PC and unplug it from the power source.
- Locate the 24-pin ATX connector on your motherboard. This is the main power connector.
- Disconnect the 24-pin ATX connector from your motherboard.
- Connect the 24-pin ATX connector from your power supply to the corresponding connector on the PSU tester.
- Plug your PC into a power outlet.
- Switch on the PSU tester.
Interpreting The Results To Determine The Wattage Of The Psu
Once you have connected the PSU tester to the power supply and switched it on, you can interpret the results to determine the wattage of your PSU. The tester will display the voltage levels and wattage on its built-in screen. Look for the wattage reading, which is usually displayed alongside the voltage readings.
It is important to note that the wattage displayed on the PSU tester may not be the exact wattage of your power supply. Some PSUs have a higher wattage than their rated capacity to ensure stability and prevent overloading. Therefore, you should aim for a PSU that has a wattage slightly higher than your system’s requirements.
By using a PSU tester to check the wattage of your power supply, you can ensure that your PC is receiving sufficient power for optimal performance. This knowledge also helps when upgrading components such as your graphics card, as you can choose one that is compatible with your power supply’s wattage. So, if you are unsure about your power supply or want to confirm its wattage, grab a PSU tester and follow the steps outlined in this guide.
Credit: www.365powersupply.com
Frequently Asked Questions For How To Check What Power Supply I Have On Pc
How Can I Check My Cpu Power?
To check your CPU power, use the Activity Monitor. Press Command + Spacebar, type “activity monitor,” then double-click to open it. Click the Window menu and select CPU Usage to see current CPU activity. Alternatively, remove the side panel of your PC’s case to check the power supply, or search for your PC’s model number online to find the PSU specifications.
How Can I Check What Power Supply I Have On My Pc?
To check what power supply you have on your PC, you can open the side panel of the case and look for information on the power supply. You can also refer to the computer’s manual or contact the manufacturer for more details.
Can I Check My Power Supply Without Opening My Pc?
Yes, you can check your power supply without opening your PC. One way to do this is by using software programs like CPU-Z or Speccy, which provide detailed information about your hardware, including the power supply.
How Do I Find My Power Supply Wattage?
To find your power supply wattage, you can check the label on the power supply itself. It should list the wattage rating, such as 500W or 750W. Alternatively, you can use software tools like CPU-Z or Speccy to find out the wattage of your power supply.
Conclusion
To check what power supply you have on your PC, there are several methods you can try. You can open your PC’s case and physically inspect the power supply unit (PSU) to find its model/wattage. Another option is to check the manufacturer’s website or product specifications using the PC’s model number.
Additionally, you can use software tools like Task Manager or applications like CPU-Z to view detailed information about your PSU. By knowing your power supply, you can make informed decisions when upgrading other components of your computer.


Leave a Reply